Support and Documentation
Remote Printing with a Raspberry Pi
This is a detailed instruction guide on how to set up PrintNode on your Raspberry Pi. The following guide assumes that you are running the default Raspbian OS and using the Pi's Graphical User Interface. It is also possible to install and run the PrintNode Client for Raspberry Pi in headless mode, using just an SSH connection. For more details please contact us.
Before downloading the PrintNode Client, you need to determine which version of Raspbian you are running on your Raspberry Pi. PrintNode supports Rasbian Jessie, Stretch and Buster. To perform the check, open a Terminal window and enter the command below:
lsb_release -a
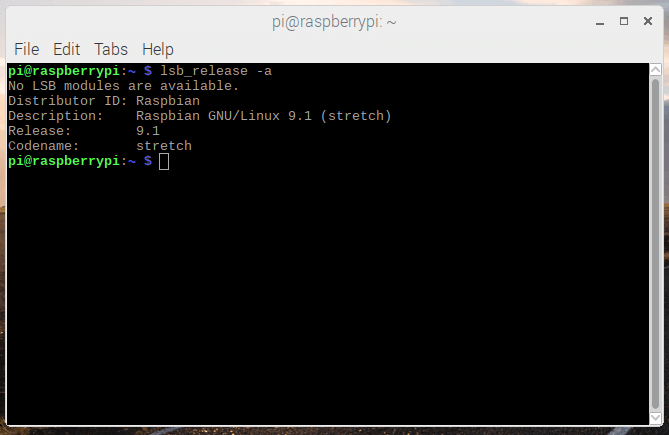
To open the Terminal window, click on the Raspberry icon in the top-left corner of the screen, select Accessories and then Terminal.

Next, go to the Downloads page and select the appropriate version of the PrintNode Client. In order to extract files from the tar.gz archive, navigate to the directory where you downloaded the archive and run the following command in the Terminal window (replacing filename with the name of the tar.gz archive):
tar xf [filename]
The archive extraction will have created a directory called
PrintNode-[version]-[os]-[platform]-[python_version].
To run the PrintNode Client, enter this directory and run the following command:
./PrintNode
A login screen will be displayed – enter your PrintNode credentials and click Sign In. If you don't have a PrintNode account, you can sign up here. It's free and you don't need to enter any payment details.
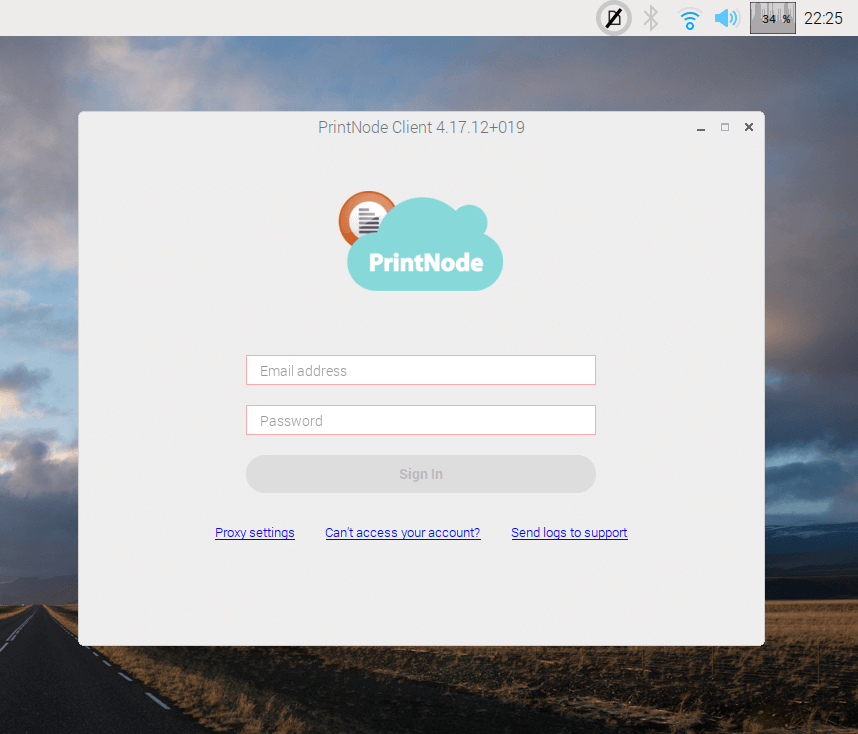
Note the PrintNode icon next to the Bluetooth icon. Its appearance tells you the status of the PrintNode Client:

Connected – displayed when the PrintNode Client is successfully connected to PrintNode.

Disconnected – displayed when the PrintNode Client cannot connect to PrintNode.

Connecting – displayed when the PrintNode Client is attempting to connect to PrintNode.
If you are planning to use a USB printer, connect it to one of the Raspberry Pi's USB ports. If you are planning to use a network printer, it needs to be bisible to your Raspberry Pi on the network.
PrintNode uses the CUPS interface. We recommend that you install your printer using the CUPS web interface. To install the printer and to ensure that the PrintNode Client can use it you first need to add your user to the lpadmin group. To do this, run the following command in the Terminal window (in our example we are using the default user, pi):
sudo usermod -aG lpadmin pi
The default password for this user is raspberry. Note that it's a security risk to leave this password unchanged and we strongly recommend that you change it.
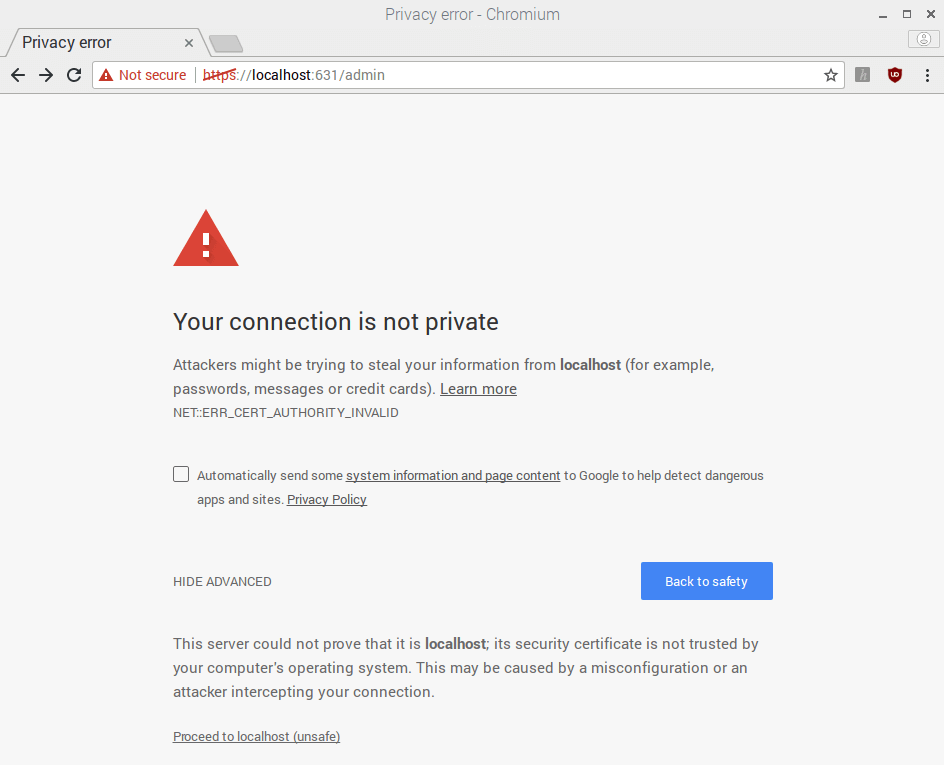
Next, open a browser and go to https://localhost:631. It is possible that you will encounter a privacy error (see example in Chromium below) – simply click on Proceed to localhost (unsafe).
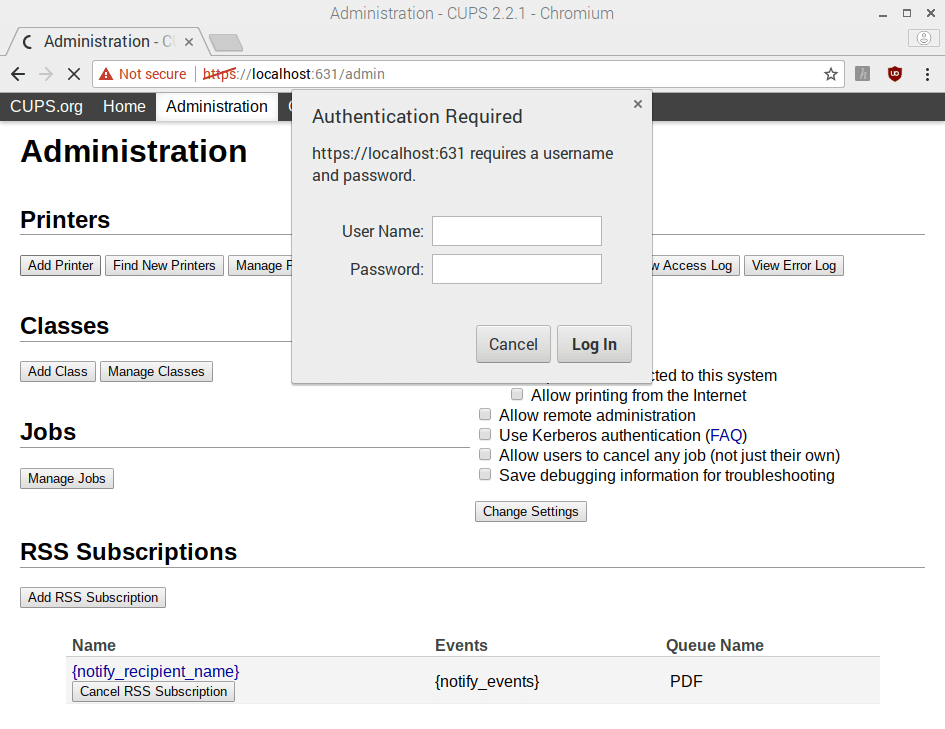
Click on Add Printer. The website will ask you to enter your user's credentials.
Select the printer you want to add. In our example this is a Zebra LP 2844 label printer.
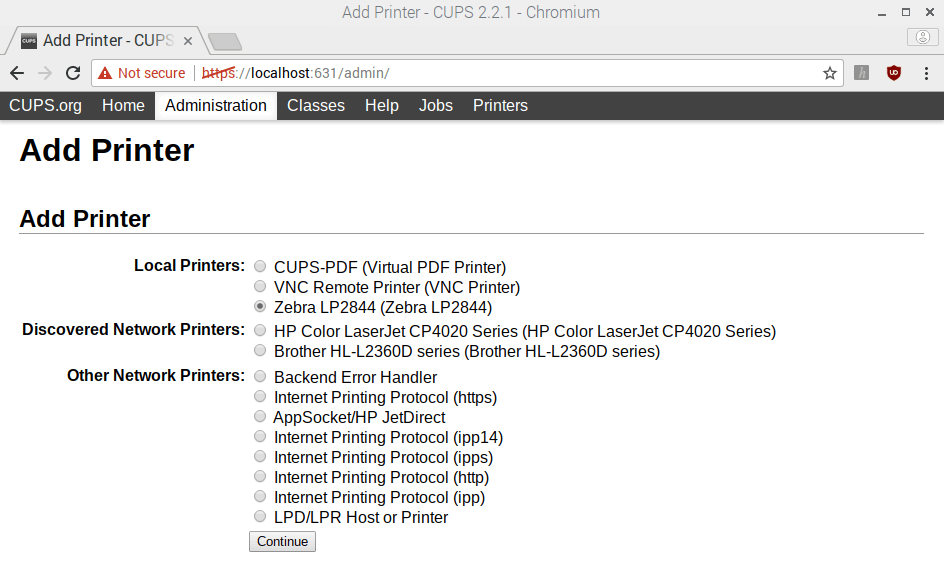
Choose a name for your printer. This name will be used by PrintNode to identify your printer. Click Continue.

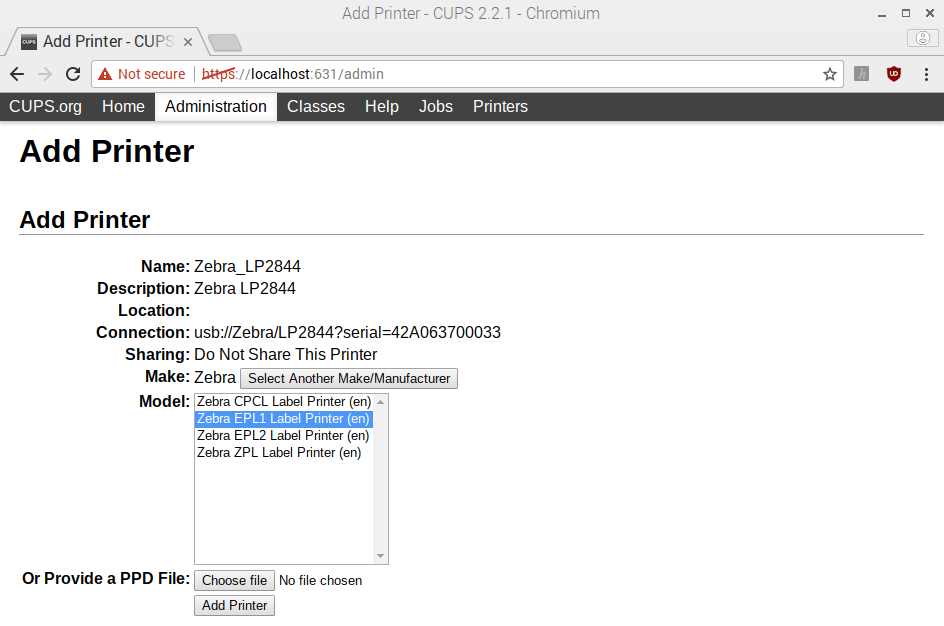
Select the model of your printer. This is a very important step. If you select the wrong model, your printer will install but you will not be able to print. For the Zebra LP 2844, for example, look at the nameplate on the bottom of the device for the languages that your printer supports. If it says EPL only, select one of the EPL models. It is possible that this will not work and you will have to change this setting later. Click Add Printer.
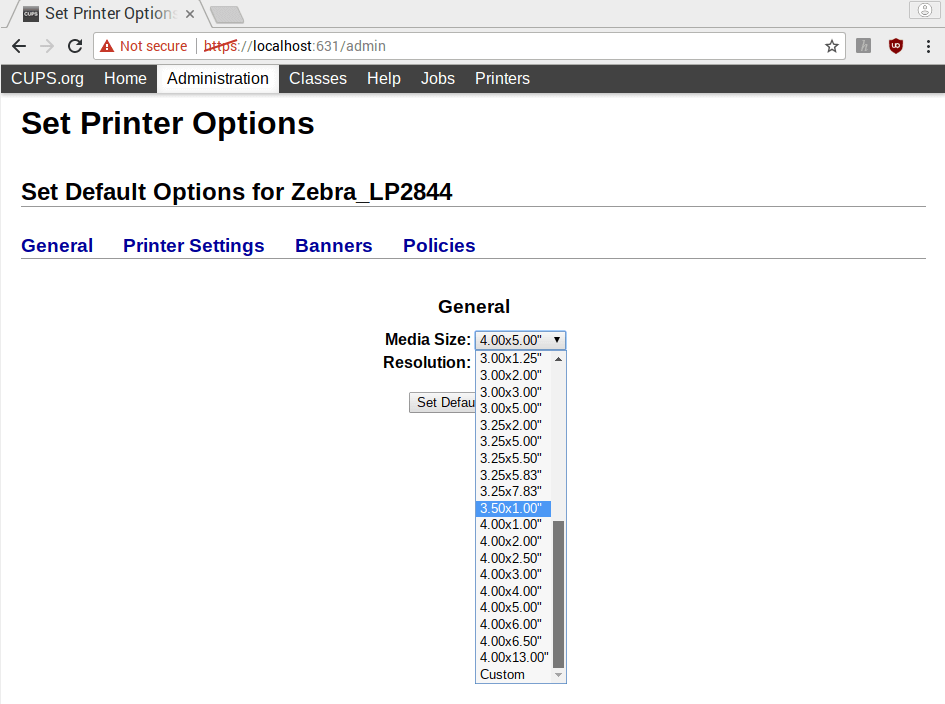
Select the media size that you will be using. Most popular shipping labels have a size of 4×6". Click Set Default Options.
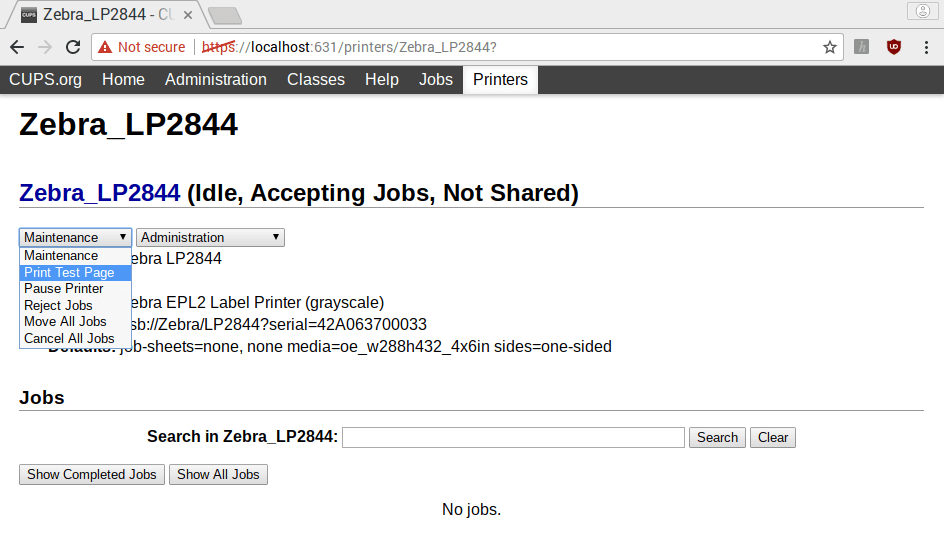
Your printer is now installed. Click on Maintenance and Print Test Page. If your page prints, you have successfully installed your printer. If not, this is probably due to selecting the wrong model. Click on Administration and Modify Printer to change the model (the sequence of steps is the same as adding a new printer).
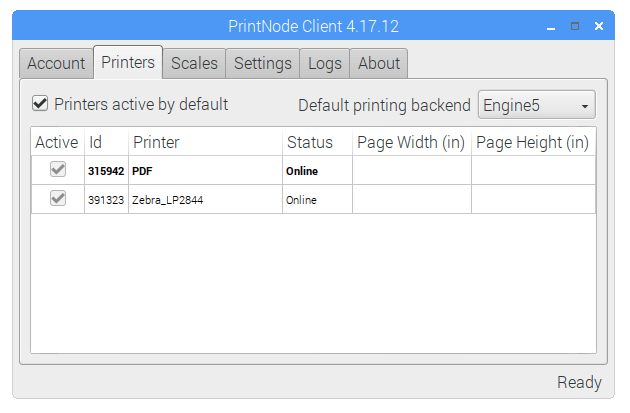
Open the PrintNode Client and click on the Printers tab. The PrintNode Client automatically identifies new printers installed in the operating system and you should be able to see your printer on the list. This also means that this printer is now available from the API and our web app.
The easiest way to test your setup is to go to our web app, select your computer and printer from the drop-down list and select a suitable test file (for the Zebra label printer a good choice is the Label 4in×6in test file).
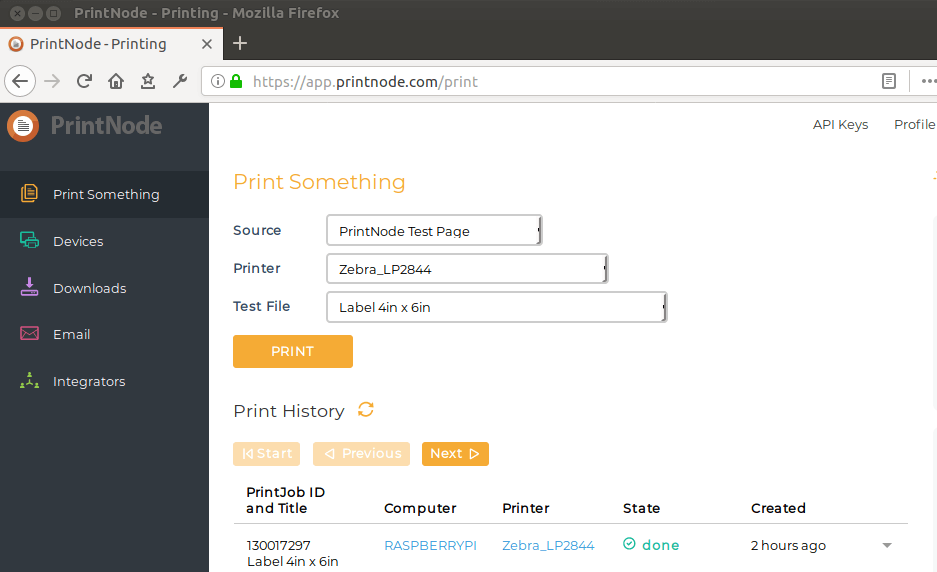
Click PRINT. Your printer should print our test page. Note that you can click the Logs tab in the PrintNode Client and see exactly how our server communicates with the PrintNode Client.

One additional note: it is a good idea to have a look at the readme.txt
file. It contains requirements of the PrintNode Client and
additional information on CUPS setup which you may find useful.
If you followed the steps above and are encountering trouble setting up your Raspberry Pi for remote printing, please contact us.
